I always wanted to make a shell top after watching the 7th Great British Sewing Bee. It seems so simple, yet so useful. I wondered if I can make one in 4 hours too, as those in GBSB. That’s why I bought the Simplicity S9133 sewing pattern.
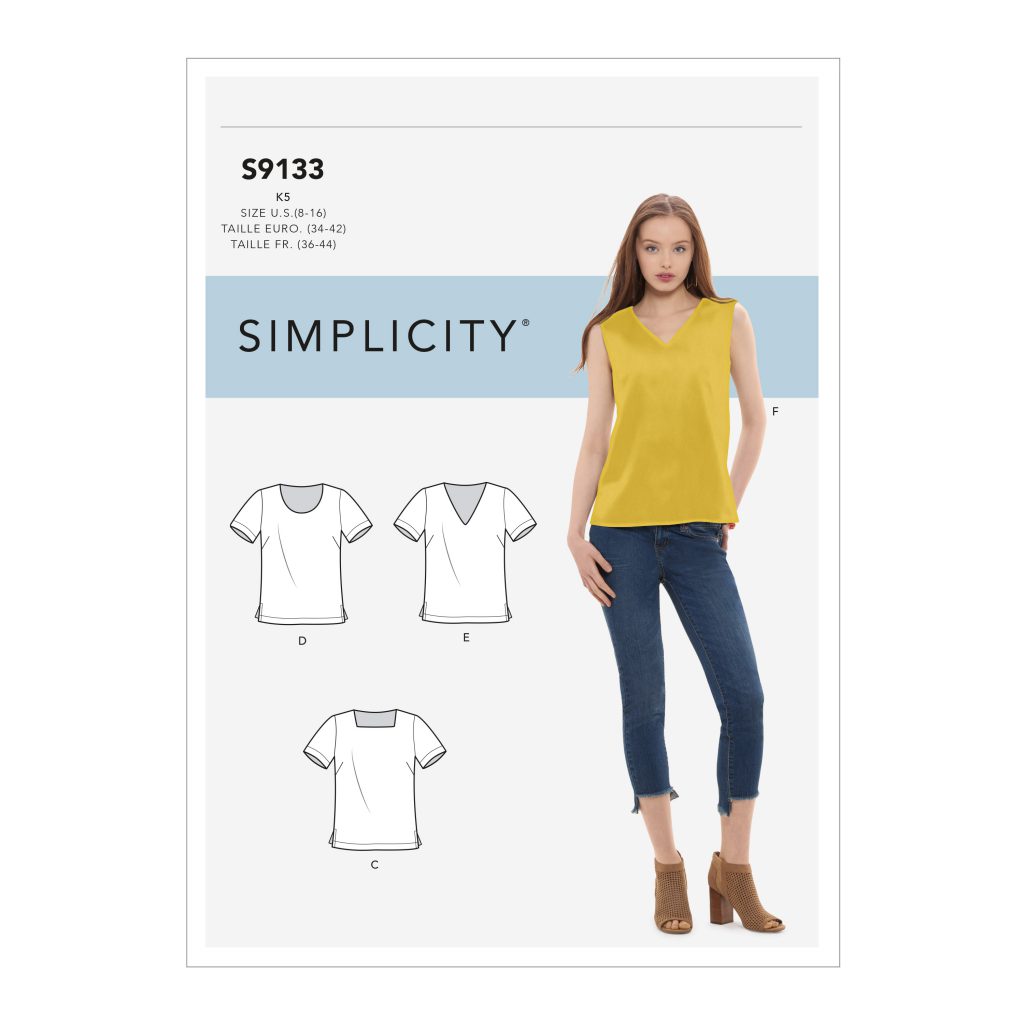
You know that I have the Wild Ginger Pattern Master design software, so I normally don’t buy simple patterns. Because I can generate the style for free. But this style looks exactly like the shell top in GBSB, and it’s available in my local Joann. I’m glad I bought it – 4 out of 6 views of the woven top pattern don’t require a closure. It’s so important that I will repeat: the top doesn’t need a zipper, nor a button!
The design
It’s a simple design with neckline variations. View A and B have a center back seam and need a button. The other views with longer necklines simple have a front and a back piece to be cut in fold. The top can be sleeveless, or with short sleeves. It has straight hem with split side seams. The pattern uses standard facing for the neck and the armhole. So it’s not completely the same as the GBSB pattern. As a result S9133 uses less fabric. The chart said 1.125 yards of 45″ wide fabric for View F size 12. I was able to make it with a 1 yard remnant piece of 44″ width. But I think it’s only up to size 14.
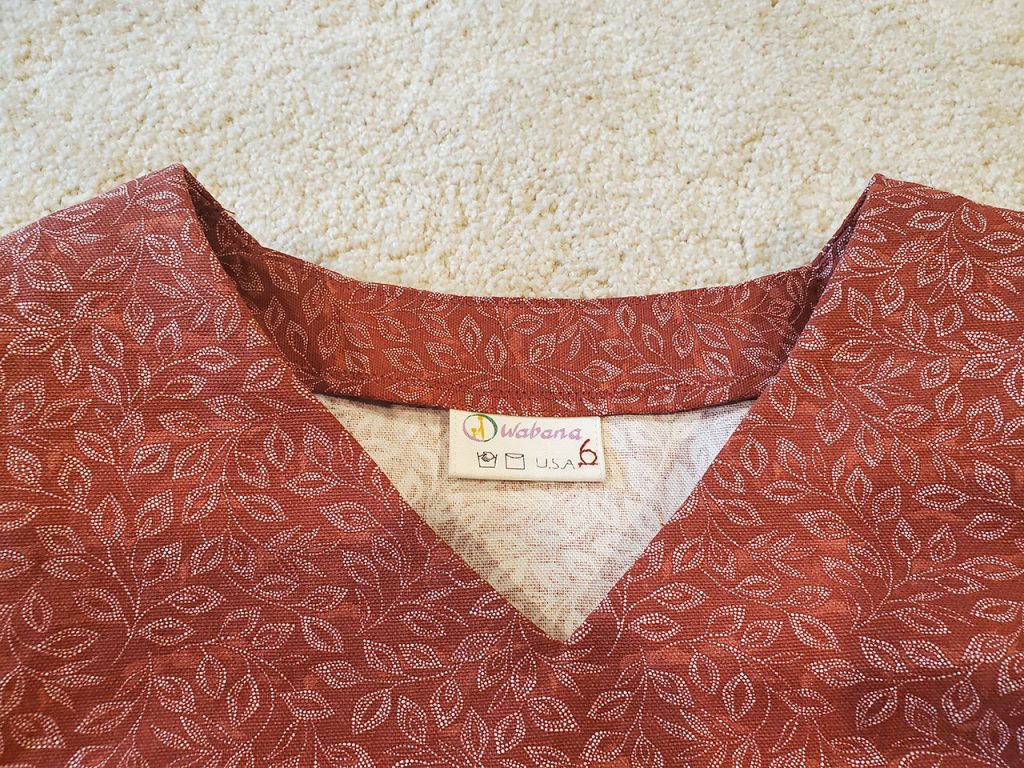
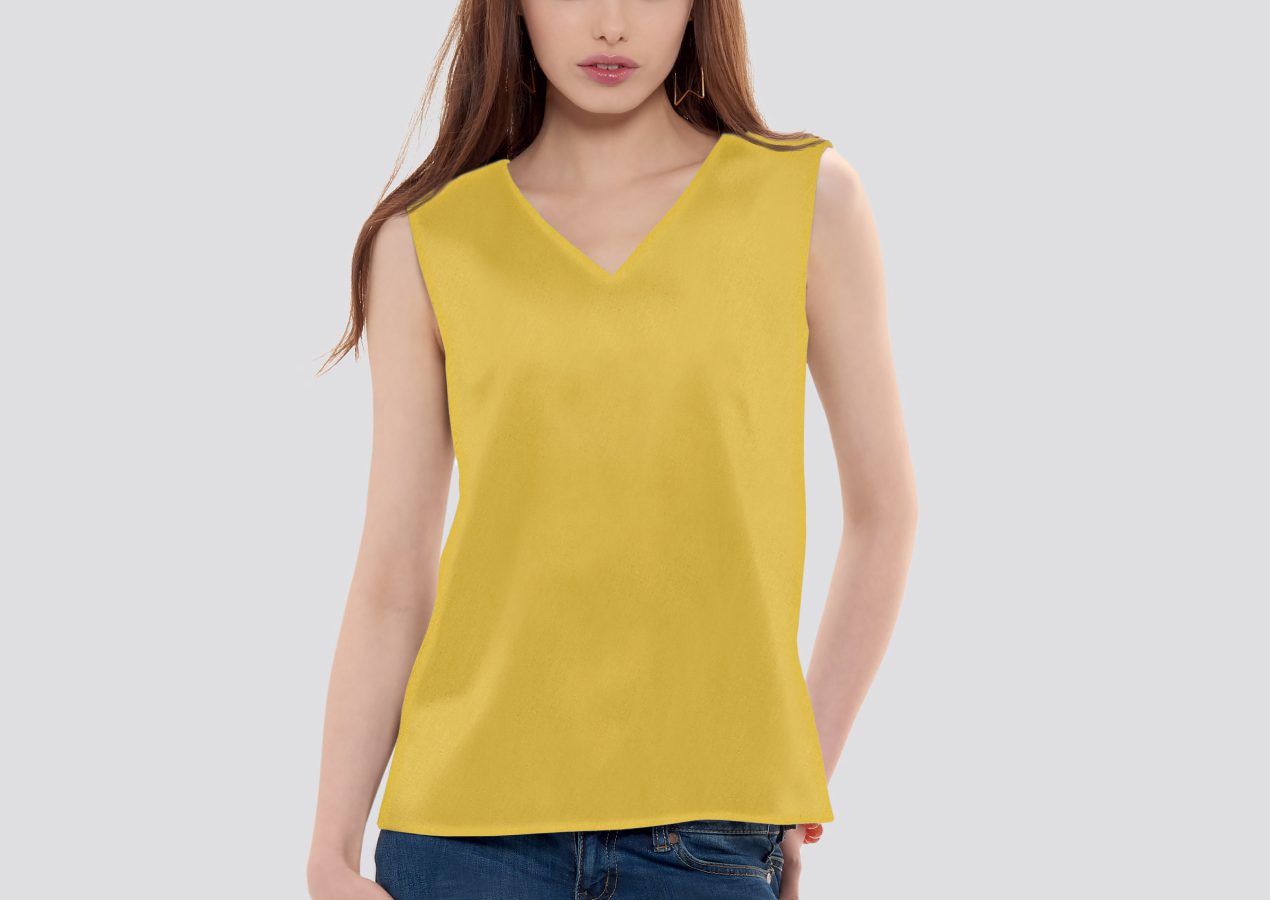
S9133 View F, Straight V neck
Fabric Choice and the patterns
This is a woven pattern. You can use cotton, lightweight pique, silks, challis, crepe, linen etc. Since it needs only about 1 yard of fabric, it’s a great way to use your scrapes. My version was made of some medium weight cotton remnant.
The pattern pieces have well positioned notches, and they matched perfectly.
Btw the label on the top just arrived this week. I will have a dedicated blog about them.
The Construction
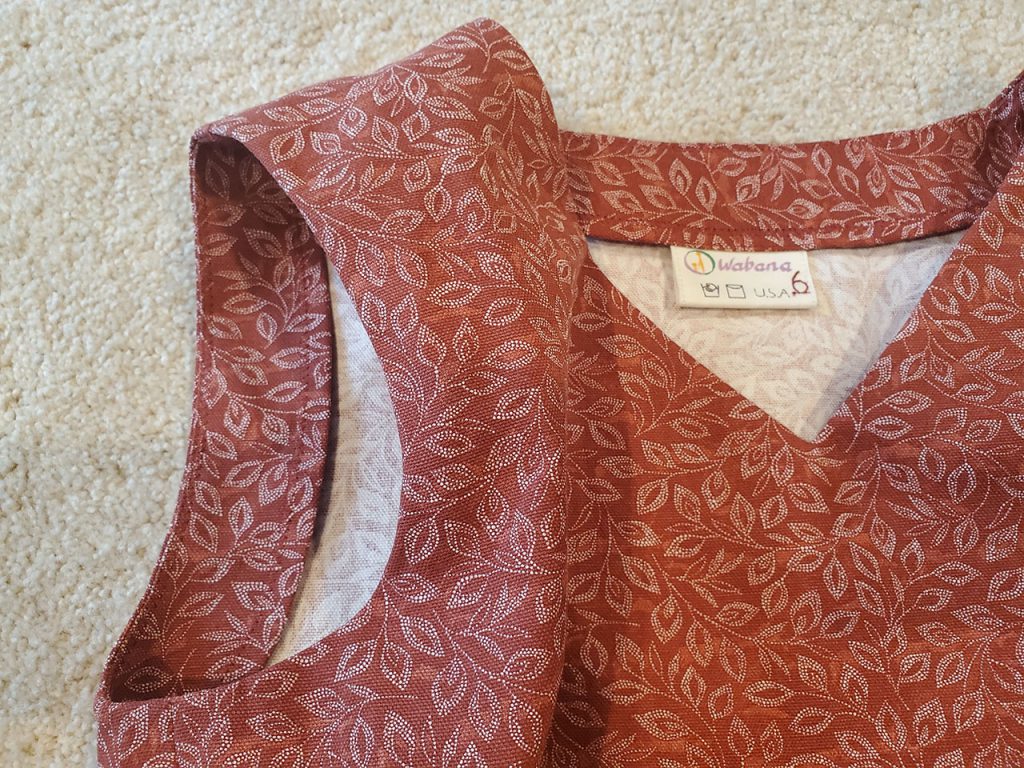
The construction is easy as you can imagine. But I feel that the steps are organized to their instruction paper space. This means, they have many details of all the steps, but not necessarily in the right order. For example, sewing the front and back pieces together, and sewing the side seams together are in one step. After that you sew the neckline facing on. By doing so, they only need to draw one diagram to illustrate both shoulder seams and side seams. And the description is concise. However, the right order should be you install the neckline facing after you sew the shoulder seams but before you sew the side seams. So you can work in flat.
It mentioned pressing in some steps, but not all. But overall, the instruction is easy to follow. I used blind hem in the end.
The Fit
I intentionally made a size smaller than my size based on measurements. It’s because I prefer clothes with less ease. I’m glad to report that I can put it on and off easily. That’s a View F, straight V neck without sleeves. It looks identical to the model picture.
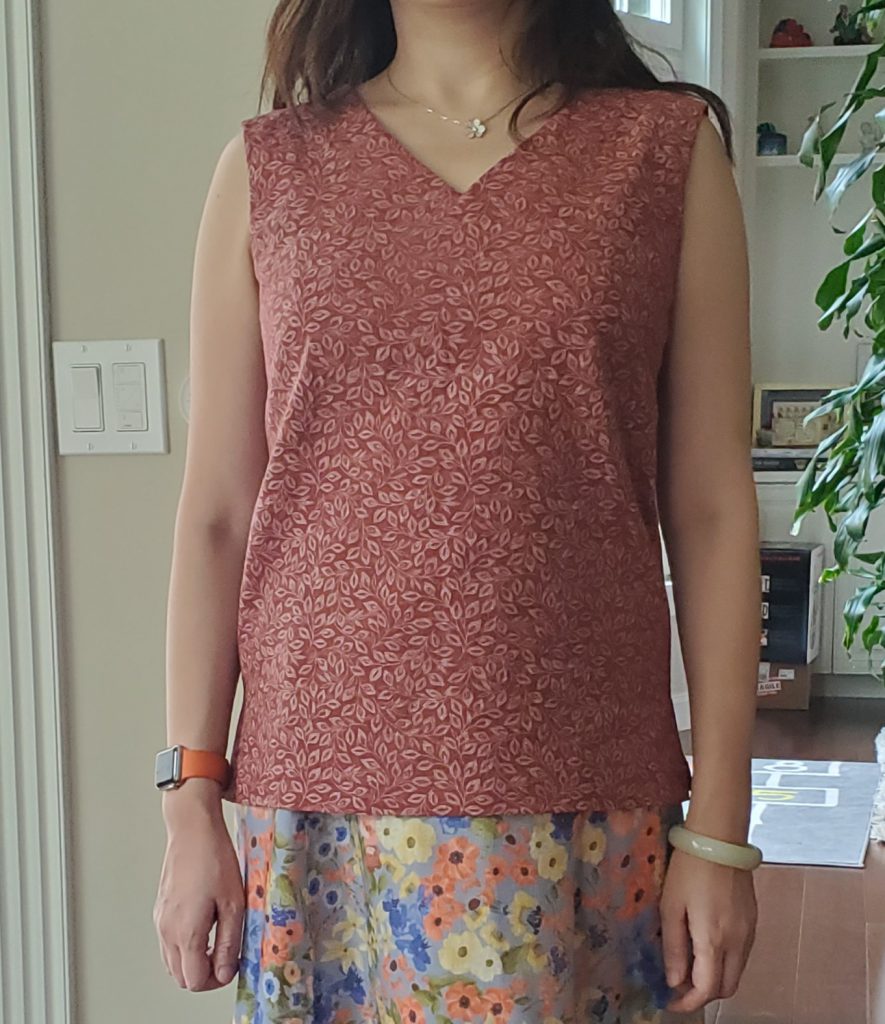
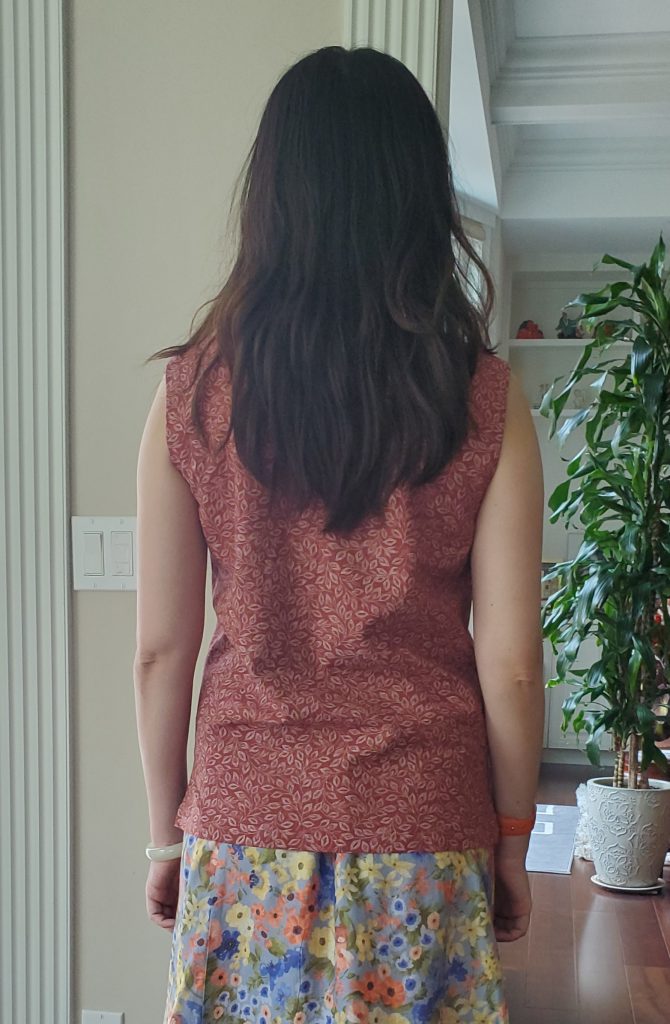
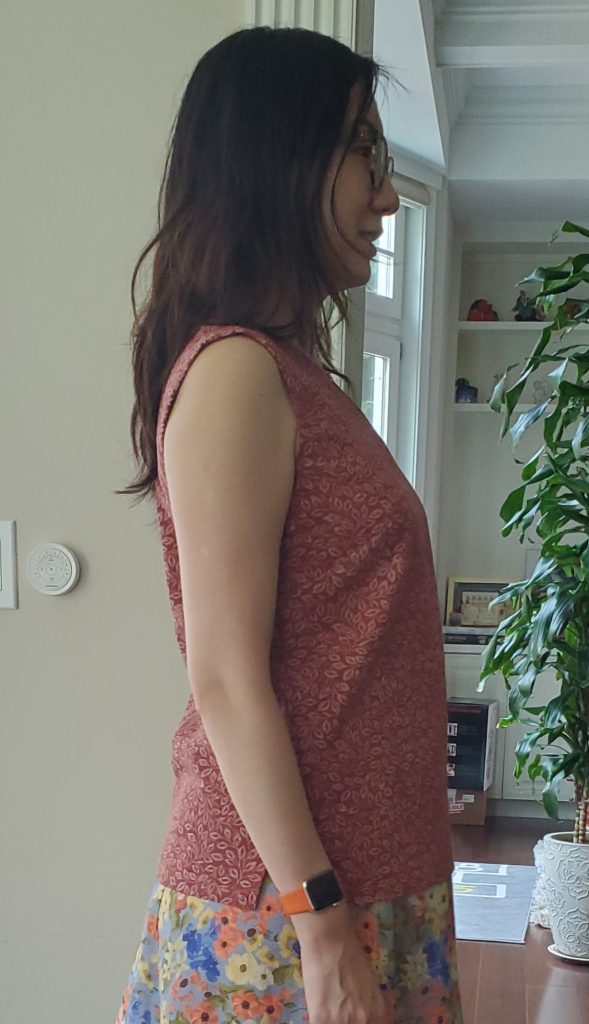
You can see it in my photo yourself. Btw I couldn’t show you my picture with full length, because I was wearing a skirt made from a pattern that is yet to be released – come back later to see what it looks. You will like it! Anyway, I want to point out the slanting ripple traveling diagonally from the apex down toward the side seam. If you view the model picture closely, you will see she has that too! Such lines could be caused by darts positioned too low. I compared the pattern pieces with my slopes. I noticed that the front shoulder line on S9133 has a steeper slope. In other words, this is for someone with more sloped shoulders than mine. The back shoulder lines however are almost the same.
The back seems to have too much length for the curve at the small of the back along the center back. It seems to have collapse in areas. Same as the shoulder slope analysis result, I think the bodice could be lifted at the shoulders a bit. I tried pinning the shoulder seam to make it more squared, and it indeed eliminated most of the back ripples. The front lines are less prominent too.
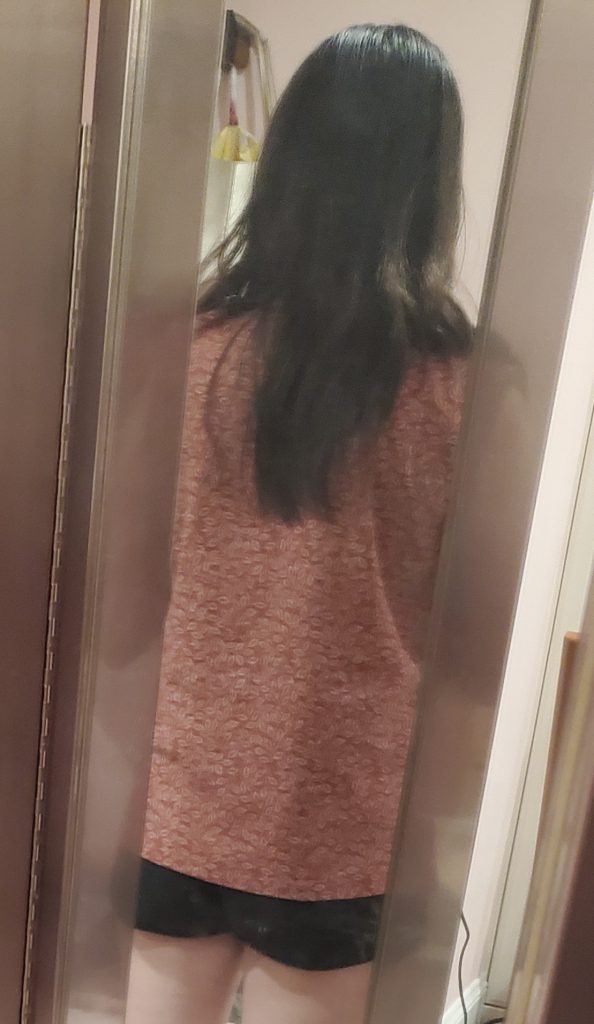
I’m sorry about the image quality of the last photo – it was taken by myself with my trifold mirrors in my not so bright closet. And my body was a little twisted in order to take that photo.
Conclusion
3.5/5 from my perspective, but could be 5 star for you.
Highlight: no closure woven top that is not baggy.
This is a basic top and I think I will make more out of the pattern. I actually highly recommend you to try it out, because it may just work for you – my shoulders are more squared than normal so this sloped shoulder pattern has more prominent problems on me. Even that was fixable. If you are unsure, always make a muslin first. I deducted 1 point due to the fit issue. Because I do need to spend more time to correct the fit.
The remaining 0.5 point was deducted due to the suboptimal order in the instruction, which is not important at all for experienced sewers. So this may be a 5 star pattern for you.
Rosalind Clayton
Any diagonal wrinkles are a depth(or dart) issue. If you create a dart in the tissue in addition or added to the current one, then taper the dart to nothing at the CF, this will remove a lot of the wrinkles. The shoulder angle indeed can also be wrong, so taking perhaps around 1/2″ extra at the armhole tapering to nothing at the neckline will also help. As for the wrinkles in the back, they are caused by too much length, or a swayback. If you take a tuck at CB above the waistline & taper it to nothing at the side seams, all those wrinkles will disappear. Tapering changes to nothing at some area of the pattern is essential so that the pattern/tissue lays flat. Good luck!
xerneas
Thank you Rosalind! Those are some detailed instructions on how to fix my fit issue. And I will try them out.
Twicsy
Usually I don’t learn post on blogs, however I wish to
say that this write-up very pressured me to check out and do it!
Your writing taste has been amazed me. Thank you, quite
great post.
Launa Pemulwuy
Your site visitors, especially me appreciate the time and effort you have spent to put this information together. Here is my website UQ9 for something more enlightening posts about Thai-Massage.
how to purchase enclomiphene online
get enclomiphene cheap mastercard
cheap enclomiphene generic canada no prescription
medicament kamagra pharmacie bon marche
commandez kamagra sans ordonnance de notre part
kamagra livraison le lendemain
cheapest buy androxal generic when will be available
buying androxal buy in london
how to order androxal generic pharmacy in canada
canadian pharmacy flexeril cyclobenzaprine
get flexeril cyclobenzaprine australia to buy
ordering flexeril cyclobenzaprine uk in store
cheap dutasteride generic pharmacy canada
ordering dutasteride generic where to buy
how to buy dutasteride generic brand
order gabapentin cheap drugs
gabapentin prices walmart
get gabapentin buy from canada
how to buy fildena purchase in canada
buy fildena generic where to buy
cheap fildena generic is good
buy staxyn generic pharmacy usa
cheapest buy staxyn cheap europe
cheap staxyn generic from canadian pharmacy
buying xifaxan uk buy cheap
cheapest buy xifaxan cheap generic uk
xifaxan with no perscription overnight shipping
koupit kamagra bez lékařského předpisu přes noc doručení
objednejte si kamagra online bez členství přes noc
koupit kamagra bez lékařského předpisu