Recently, Brother / Baby Lock launched their second upgrade to the Luminaire / Solaris line. You can purchase the upgrade an have all the additional XP3 features on your XP1 or XP2. An optional accessary in this upgrade package is a new 10×10 magnetic hoop from Brother. It retails for $699 which is a very reasonable price compared with the other two magnetic hoops from Brother (5×7 and the sashing one). I’ve got the hoop and tested it. And here I’m sharing my experience and recommendations.
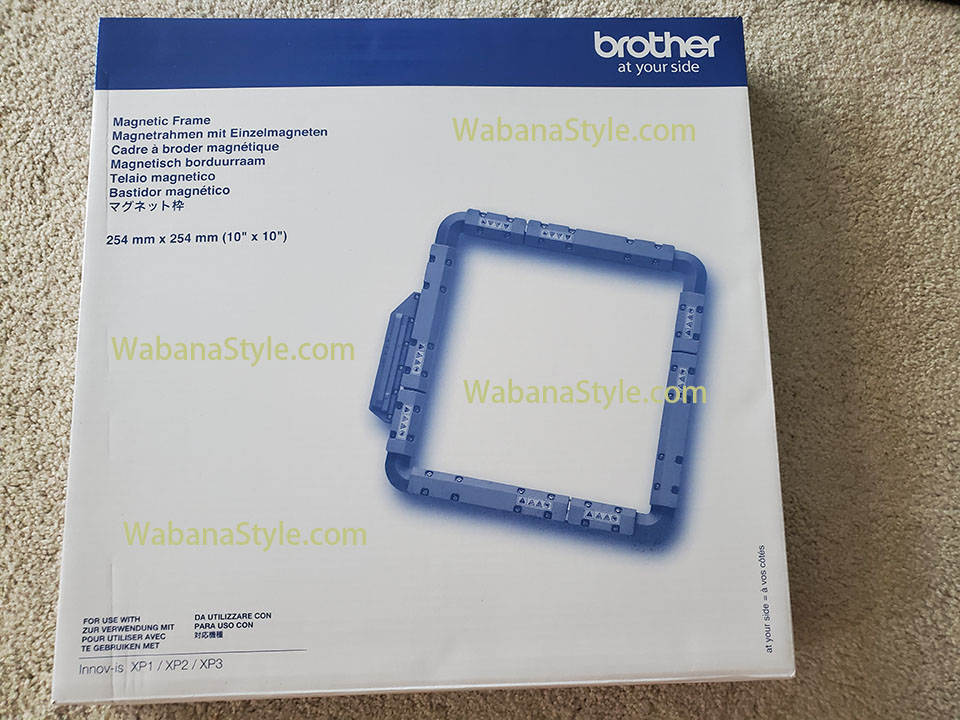
This is apparently a high quality, official magnetic hoop that is far more convenient to use than a traditional hoop. At the same time it’s also significantly more expensive ($800 vs. $40 for 8″). If you are already set on buying a magnetic hoop, you may wonder about which size to get, and which brand to buy. A very popular third party brand is Dime. It’s a trustable brand too and it makes magnetic hoops for all major brands like Brother, Bernina, Janome. The price is very affordable. The largest size for brother 10.5″ x 16″ only sells for $160. So, which one shall you get?
Size comparison Brother vs. Dime
The embroidery area of the Brother one is 10″ x 10″, and the Dime one is the maximum allowed by Luminaire which is 10.5″ x 16″. However, the Brother hoop has more margin so the outside measure is even wider.
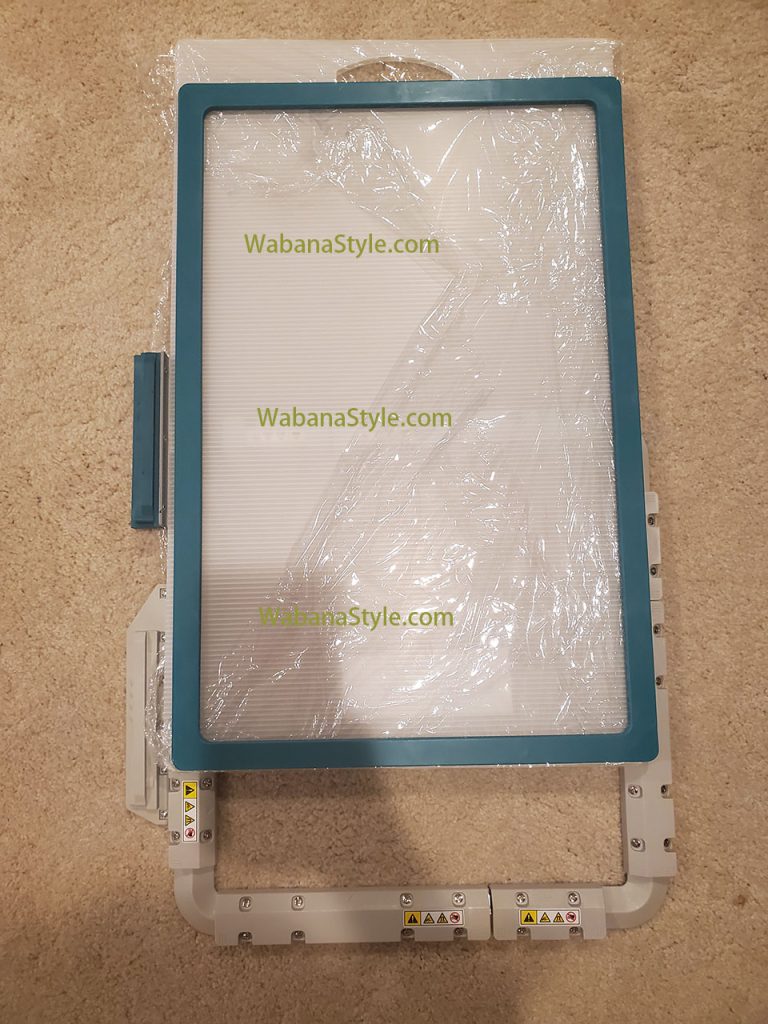
This difference is not much. Both can use the 15″ wide stabilizer , and can’t use the 12″ one. The other dimension’s difference is negligible because it’d be determined by your embroidery size, instead of the hoop size, if you know this little trick of how to save your stabilizer: only cut it after done. This trick may only work with magnetic hoops which don’t leave a huge dent in the stabilizer. The traditional hoops would mess up it at the boundary, but you can still use it after ironing it flat.
Depending on what embroideries you do, you may prefer one size or another. I have hoops of all sizes, and also all magnetic hoops (I use more than the two brands). The size I used most is the 6″x10″ magnetic hoop. It’s a perfect size to make ITH purses. And 5″ or 6″ are common sizes in quilt. both can fit here. The embroidery area is slightly wider than 6″. Those with larger than 6″ width are mostly squares, i.e. quilt blocks. So the 10″ x 10″ fits already, and you don’t need the 10.5″ x 16″. The 10.5″ x 16″ on the other hand can be used to embroider squares too without any more waste (see my tricks above). And it’s also good to make larger designs, like a placemat, or the book cover for a composition notebook. You can do it in one hoop on Luminaire.
Conclusion: if you do ITH projects, and can only have one hoop, I suggest the largest Dime hoop. But if you often do quilt blocks, the 10 x 10 size is more useful.
Embroidery quality
There are more differences than the sizes. You probably noticed that the Dime hoop has a single metal. And the Brother one has 8 pieces. They both has strong magnet to hold your fabric, stabilizer, and quilt sandwich in place. The difference is how you hoop. When it’s a single piece of metal, you often end up with uneven stabilizer in the middle, which will cause puckers. This is because when you put the top hoop near the bottom one, the strong magnet will immediately draw the two together, left you with no time to fine adjust the position. You do want to align them before you embroider, and that will twist the stabilizer. It’s very hard to get it all flat but with patient you can get very close. The final result is slightly loose embroidery area, because you won’t have a chance to taut it. This, has been perfectly solved in the Brother hoop. The side pieces are shaped. And this is the steps to make a perfect hooping.
- Lay your stabilizer (and fabric if you don’t float) on the hoop bottom, aligned with the left hand side.
- Put on the small pieces on all 4 sides, as shown in the picture. You just need to keep the stabilizer flat. Do not push on the pieces yet. Just lay them there. The arrows should point inwards.
- Now add the 4 long pieces. At this point the pieces may sit loosely on their ideal positions, as shown in the picture. Arrows should point inwards.
- Now push all eight pieces onto the button frame and they should perfectly fit. After this step all pieces would end up on the same line on all sides. And this is the step to taut your embroidery area.
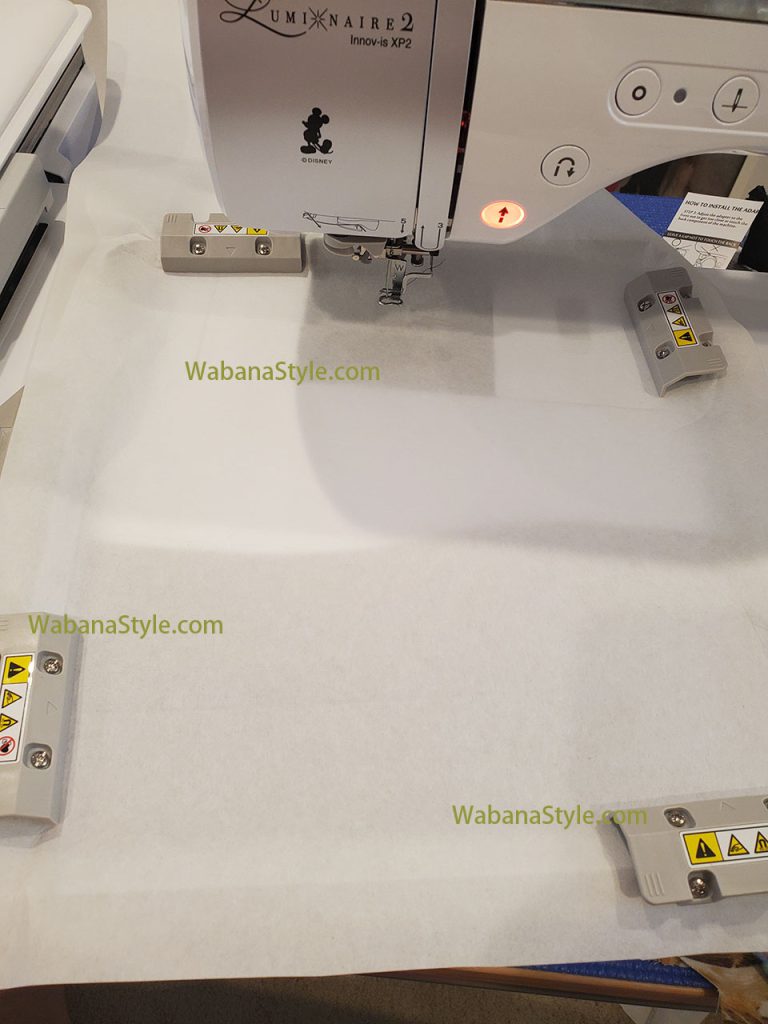
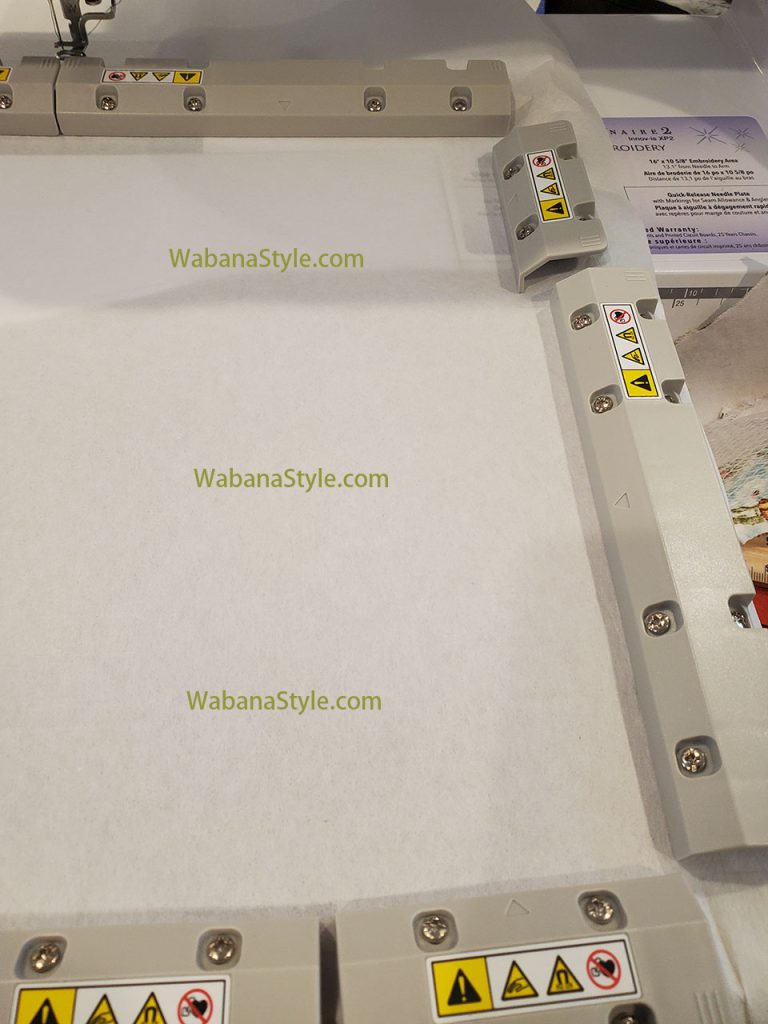
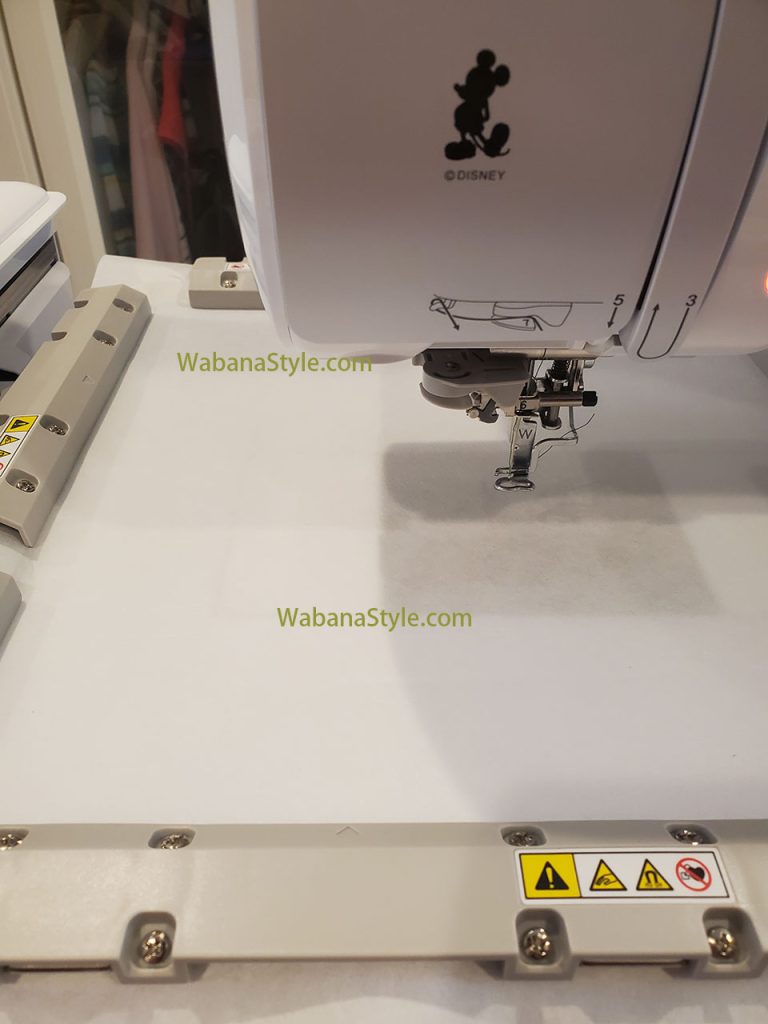
And now you have a perfectly hooped embroidery area. It’s guaranteed to work. Since the area is taut you’d get better embroidery quality.
Brother Hoop’s disadvantages
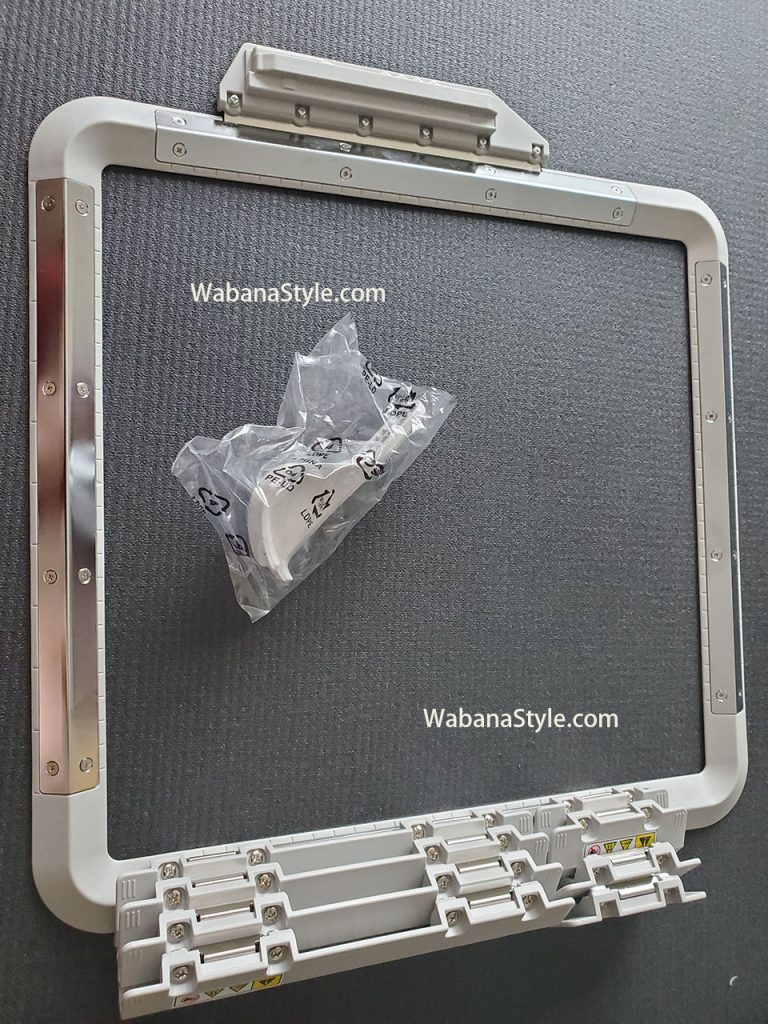
The quality of the hooping doesn’t come with no cost. The eight magnetic pieces are much thicker than the top magnetic metal of the Dime one. And the needle can’t go pass it – you need to move the needle to the gaps to take the hoop out. In some positions it’s very hard to do so. Also, because there are 8 pieces, it’s more work to remove the final work than with Dime. The tool that comes with the magnetic hoop is useful. Or it needs quite some strength to split the magnetic metals. To save the effort to remove them, I store my hoop like this:
Verdict
Overall, the Brother new magnetic hoop has high quality, and is a perfect fit for your sewing machine – it feels so light weighted to put it on or off the machine. The Dime one fits but you can tell it’s from a third party. The friction to put it on is higher. And sometimes it’d scratch your sewing machine when the hoop’s height is not well adjusted. So between the two of the same size, I’d vote for the Brother one if you can afford it. That’s why it’s a fantastic deal to buy the hoop with the Luminaire XP3 upgrade bundle. The price written in the bundle is only $399 instead of $699. This may differ based on vendors though. Shop wisely.
Personally I’d get both, and also the 6×10 Dime hoop – the smaller size is much easier to hoop so the advantage of the Brother hoop is not obvious – I also have the Brother 5×7 one but I rarely use it. I often use the 6×10 one with a roll of 10″ width stabilizer. It’s much more affordable at $0.26 per yard!
Happy embroidery everyone! And let me know if you’ve also chosen the Luminaire 3 upgrade package!
Eloise Hoag
Your writing style is cool and I have learned several just right stuff here. I can see how much effort you’ve poured in to come up with such informative posts. If you need more input about Thai-Massage, feel free to check out my website at 94N
buy cheap enclomiphene uk no prescription
cheapest buy enclomiphene canada online order
is there anything over the counter like enclomiphene
buying androxal cheap online canada
cheap androxal generic cheapest
buy androxal uk suppliers
buy generic rifaximin no prescription
how to order rifaximin generic free shipping
discount rifaximin purchase in canada
buy xifaxan in Chicago
generic xifaxan canadian pharmacy
xifaxan low prices
order staxyn cost tablet
get staxyn canada price
how to order staxyn generic tablets
buy cheap avodart uk buy online
how to get avodart
avodart no perscription next day delivery
dutasteride australia no prescription
get dutasteride canada with no prescription
Buy dutasteride without a perscription or membership
buy cheap flexeril cyclobenzaprine without prescriptions canada
buy cheap flexeril cyclobenzaprine generic canada no prescription
canada online pharmacy flexeril cyclobenzaprine
purchase gabapentin price usa
order gabapentin usa online pharmacy
how to buy gabapentin price in us
cheapest buy fildena cheap store
purchase fildena cheap europe
get fildena canada generic
how to buy itraconazole cheap uk
cheap itraconazole usa drugstore
get itraconazole australia to buy
kde koupit kamagra bez lékařského předpisu bez poplatků
sobotní doručení kamagra lékárnické
obecný online kanada kamagra
sans ordonnance kamagra acheter bon marche
kamagra sans ordonnance pour livraison le lendemain
medicament kamagra pharmacie emplette contre